Introduction

Great expectations can lead to bitter disappointments. But, be more realistic, and the outcome can surprise you. No, I don’t want to grow a knee-long beard or ankle length hair, and make money by stating the obvious – I am quite happy as a motoring journalist, thank you. But, the first line did ring true for me when it came to the Xpulse’s rally kit.
But, before I communicate more on that, let me just quickly run you through where we are.
Stage One

In the previous report (you can read that HERE), we introduced you to the extremely well thought-out rally kit from Hero for the Xpulse 200. Designed, developed and – a loud applause where due – homologated for road use, the goal with the kit was to give off-roading enthusiasts an additional set of tools to make their stock rides more involving, more performance oriented, and more fun.
We also told you that we aren’t going the whole hog with the rally kit. But instead we intend adding bits to the Xpulse in stages. And as part of stage one, we have made the suspension upgrade.
It’s something one can do in their garage, of course, but it’s not a one-man job as I found out. Thankfully I don’t have a damaged crankcase or a bruised kid to show for it, which is exactly what the outcome looked like to me when things started to go south. I will spare you the details, but I will tell you this – a mechanically sound friend, a high stool, and some tools to go along, is a must if you choose to do it yourself.
Or better still; get it done at the Hero service centre.
Installation

The suspension switch itself isn’t all that tedious or complicated. The front is easy – get the brake caliper off, then the front wheel, follow it up by loosening the bolts on the Tees holding the forks, and then wiggle the forks and drop them down. Follow the reverse order with the new forks, and it’s done. We did however ‘drop the Tee’ a little to give the bike a sharper rake.
The rear suspension is a little more tedious. Pull out the side panels, pull out the tank, pull out the airbox, pull out the chain guard, and then unbolt the rear shock and wiggle it out. As with the front, the reverse order of things with the new rear shock will make your bike as good as new. Now, to have easier access to the rebound adjustment screw, we mounted the shock with the arrow pointing to the rear of the motorcycle instead of the front.
The Ride
Now to the bit about great versus realistic expectations. I believed the rally kit suspension would give the Xpulse a magic carpet ride. It would give me the brilliant riding ability off-road I never knew I had. I thought it would make me legendry.
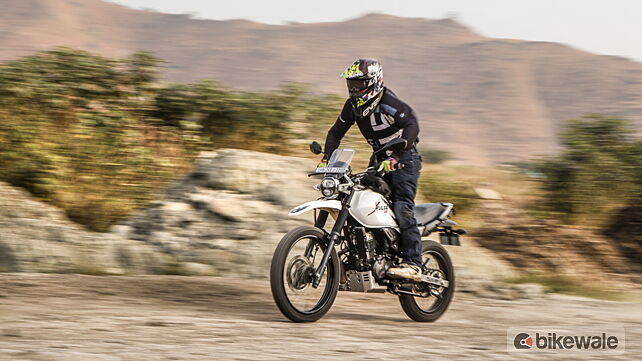
But instead, the first time I went out, I fell. And then I fell again. Till I realised the higher suspension travel and the higher ride height had moved the Xpulse’s center of gravity upwards. Its suspension geometry was different too. It wasn’t as agile as before. And, I had to compensate for the rise in CG especially when riding slowly. Plus, the springs on the front and rear of the rally kit suspension are stiffer than stock. And so there’s no ‘magic carpet’ like feel at slow speeds at all.
But the quicker I rode, the better the Xpulse felt! Bumps and ditches and rumblers, which could be felt on the stock bike just, disappeared under the rally kit. And over bigger bumps and deeper ditches and rocks – the kind you find over fast open trails – where the stock bike’s front suspension was near bottoming out and the rear collapsing, the rally kit was just skimming over stuff. It was fantastic! I also found braking over bumpy surfaces much better with the rally kit.
And then it dawned on me – RALLY KIT. It’s for those who want to ride fast over poor surfaces. It’s not a ‘TRIALS KIT’ designed to make the bike friendlier over obstacles at sow speeds.
What’s Next?
Next, we will tell you if the handlebar risers and the flat rally seat are any good…
Gallery
1/3
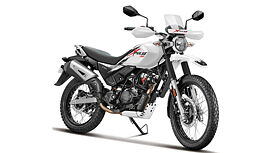
Hero Xpulse 200 Right Front Three Quarter
Double Tap to Zoom


