Maximus PRO Review – Installation

A couple of months ago, we introduced you to the Maximus PRO. It’s a handy little navigation device for touring enthusiasts, with a bunch of additional services to improve your riding experience. But how do you get it up on your motorcycle? Is it easy to do it yourself? Does it require any modifications? This DIY guide will answer all these questions.
Install the Display Module

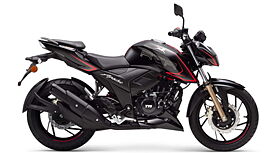
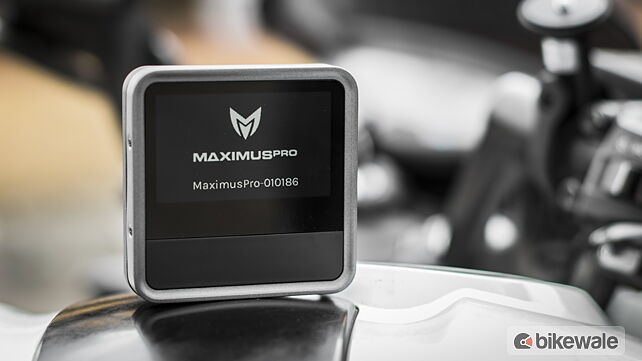
The Display Module has to be installed someplace where it is convenient for you to look at while riding. As such, the handlebar is the obvious choice. You can choose the left or right handlebar depending upon your bike or your preference. On the Apache, I had to remove the brake mount in order to get the mount in place. While this wasn’t very complicated on the Apache, you might need professional help depending upon which bike you own.

The Maximus PRO ships with the mount, three spacers to fit different handlebar sizes and an Allen key. Choose the correct spacer according to the thickness of your bike’s handlebar. Screw the mount onto the handlebar using the Allen key with the Display Module holder on top. Make sure it is angled perfectly according to your riding position. The Display Module connects to the Connectivity Module and your smartphone wirelessly, so there is no wiring mess to be taken care of. Besides, you can just unscrew the Display Module and carry it with you when you get off the bike. This reduces the chances of the Display Module being stolen. 
Secure the Connectivity Module

The Connectivity Module is the device that interacts with your smartphone and the Display Module. It draws power from the bike’s battery, but thanks to the abundantly long wire, the Connectivity Module doesn’t have to be installed right next to the battery. In the TVS Apache RTR 200 4V, we found a convenient space under the plastic tray below the pillion seat. The Connectivity Module is fairly compact, and you shouldn’t have problem finding space to install it irrespective of which motorcycle you ride. You can also install it below the rider’s seat (be careful not to block the air intake) or in the toolbox. Once you have finalised on the location, you can secure the Connectivity Module using the zip ties supplied in the box.

Connect the power terminals

Route the entire bunch of wires from the Connectivity Module towards the bike’s battery. The wires are neatly bunched up in a sleeve, so there is no risk of the wires getting tangled up. The power terminals have BAT + and BAT – signs on them, and are supposed to be connected to the battery. Needless to say, keep your motorcycle's ignition turned off during this entire procedure. As a thumb rule, always start with the negative terminal while unscrewing the terminals on the battery. And when connecting the wires to the battery, always connect the positive terminal first. Connect the black BAT – wire to the negative terminal of the battery and the red BAT + wire to the positive terminal. Cover up the positive terminal of the battery with the sleeve to ensure it doesn’t cause a short circuit.

Tap into the ignition fuse

This is the trickiest part of the installation. Every bike has an ignition fuse, which loses power when the ignition is turned off. Once you tap into this fuse, the Connectivity Module can identify when the motorcycle is turned off, and stops consuming the battery. This is a very crucial step, and tapping into the incorrect fuse can lead to the Connectivity Module zapping your battery and leaving you stranded. I learnt this the hard way.

The Maximus PRO box contains two blue-coloured T-Tap connectors. Choose the Connectivity Module wire which has ‘For Ignition’ written on it and attach one T-Tap connector to its end. To identify the Ignition fuse, you can either ask your mechanic or refer to your bike’s instruction manual. In case you have access to a multimeter, you can identify it yourself. Tune the dial to ‘Voltage’ for a range of 0 to 20 volts, connect the negative terminal of the multimeter to the battery’s negative terminal and the positive terminal to the metal part on top of every fuse one by one. The fuse which gives out a reading with ignition turned on and a ‘0.00’ reading with the ignition turned off is the one.

Choose any one of the two wires from below the fuse and clamp the T-Tap connector over it. Once you clamp it properly and secure the clip, the metal bits between the T-Tap connector will cut through the insulation and come in contact with the wire. As an additional precaution, you can cover the exposed metal with insulation tape.

Tape the other two wires

There are two additional wires coming out of the Connectivity Module which read ‘For Fuel Gauge’ and ‘For Relay’. Maximus PRO will soon be upgraded to provide additional features which will make use of these. But for now, just cover up the wire with insulation tape. Tidily bunch up the wiring together with a zip tie.

In our next update, we will have the Maximus PRO performance review covering everything from how it handles navigation to its safety features to the social experience, along with our verdict on whether this device is actually worth buying. Watch this space! The Maximus PRO was introduced at Rs 14,999, although the prices have now been dropped to Rs 12,999. It will soon be available through e-commerce portals. For now, you can purchase it through their official site.

Photography by Kaustubh Gandhi
Gallery
1/17
Maximus PRO Review – Installation 1
Double Tap to Zoom




![[object Object] ThumbNail Images [object Object] ThumbNail Images](https://imgd.aeplcdn.com/642x361/bw/ec/34164/Maximus-PRO-Review-–-Installation-11-126052.jpg?wm=2&q=80)
![[object Object] ThumbNail Images [object Object] ThumbNail Images](https://imgd.aeplcdn.com/642x361/bw/ec/34164/Maximus-PRO-Review-–-Installation-12-126053.jpg?wm=2&q=80)
![[object Object] ThumbNail Images [object Object] ThumbNail Images](https://imgd.aeplcdn.com/642x361/bw/ec/34164/Maximus-PRO-Review-–-Installation-13-126054.jpg?wm=2&q=80)
![[object Object] ThumbNail Images [object Object] ThumbNail Images](https://imgd.aeplcdn.com/642x361/bw/ec/34164/Maximus-PRO-Review-–-Installation-14-126055.jpg?wm=2&q=80)
![[object Object] ThumbNail Images [object Object] ThumbNail Images](https://imgd.aeplcdn.com/642x361/bw/ec/34164/Maximus-PRO-Review-–-Installation-15-126056.jpg?wm=2&q=80)
